

This was a tricky sort of a project. The client came to me and said, "We've got a new building that some of our employees will be moving to, and we need a video to get them jazzed about the facility". The only creative that I would have to work with would be a bunch of still photos. What to do! It would be easy enough to drop them on a timeline with some pan-and-scan and music, but it called for something with a bit more visual dynamism. I decided to use the 'ole "Simulated 3d" look.
Update: This technique is also referred to as the "Ken Burns" (or maybe it's Ben Kurns) effect. Once you've probed my page, do check out another 'how to' at Bob Donlon's excellent blog.
Further Update: A debate broke out on the After Effects list that this is not, in fact, the 'Ken Burns' effect. Decide for yourself at the wikipedia article discussing it. One might argue, though, that this technique needs a name, and so I might humbly suggest calling it the "Alan Shisko Effect" :)
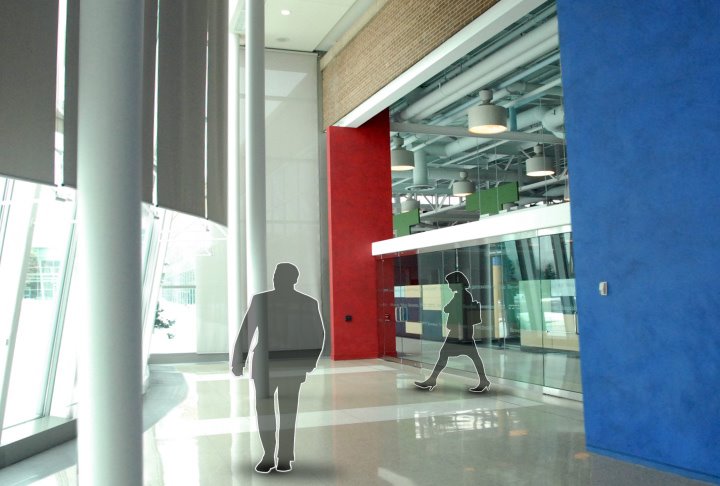
The premise is simple: using photoshop, cut elements out of a picture so that you have (at a minimum) foreground, mid-ground and background layers. Bring it in to After Effects, distribute the layers in a 3d composition along the Z axis (the back and forth dimension) with some scaling applied to match everything up visually, then make a little camera move. If done carefully, you'll end up with an effect that looks as though you made the shot in the actual building with a dolly or track.
Take a look at the video (Quicktime, 22mb, 2:30) to see the final result, then watch this clip (Quicktime, 9.5mb, 11 minutes) to see an overview of the technique in production.
It wasn't just the client that was happy with the end results: the piece garnered a Gold at the 2006 Promax/BDA awards in New York this past spring! Whoo hoo! And that was on top of a silver awarded earlier in the same ceremony!
Thursday, October 19, 2006
Giving Flat Stuff Depth, plus... Awards!
Subscribe to:
Post Comments (Atom)


3 comments:
Alan,
Nicely done piece! Especially effective from a different perspective. About half-way through, you've got a shot from above. That really sells the 3D for me.
It must have taken a ton of work to separate the layers in each photo.
Appreciate the tutorial also
Chris,
Yes, some shots are certainly more effective than others. And yes, it was a ton of work :) Some shots are easier than others. If I've got a 'foreground' object that has to be cut out and floated PLUS it has to be removed from the mid/back ground (to sell the camera move), then it can get pretty tricky depending on what's got to be cloned out. On a case by case basis, some shots could get cut in a couple of minutes, where others might take close to an hour.
Alan,
While I know that no one likes to talk about money on a personal level, I was curious what this project paid. The reason I ask is over the summer I did a similar in-house video for my brother-in-law (although, not nearly as complex as your project). He had no budget to speak of so he came to me to see what I could do. I do motion graphics purely as a hobby (and the guy is family) so I didn't charge him. But, it took FOREVER and, in all honesty, I'm curious what I would have gotten if I had done the work professionally. (As a hobby project that saved my b-i-l's butt and budget, I got paid with a steak dinner. Ha, not a fortune, but everyone has to start somewhere.)
Really enjoy your blog. Keep up the good work.
Post a Comment